 Rob Bentley
I’m not sure how many iOS developers do Android development as well (or even use an Android phone 🤓), but if you do, I’m sure you are familiar with Toast.
For anyone reading who is not familiar with a Toast View, it is used for letting the user know something happened, but not requiring them to push a button, with a little rounded corner view that appears at the bottom of the screen.
Here is a picture of a Toast on Android.

In iOS, this view isn’t a part of UIKit, so a lot of times you will see developers use what is called a UIAlertController to give these messages to the users.

The problem with this is that it requires a user to push a button to dismiss it, which isn’t always the best use case.
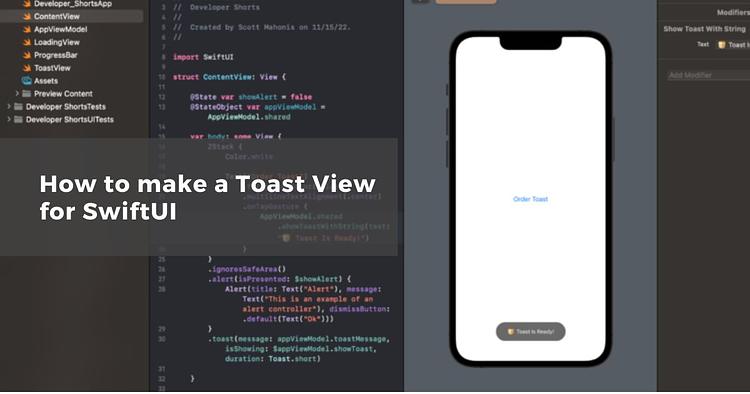
Sometimes you will want to let the user know something without needing them to interact with it. This is why one of the first things I did when switching to SwiftUI was create a Toast View for iOS. The goal for this was to be able to easily call it from anywhere in the application, so that we don’t have to write a bunch of code in each view where we want to use it.
Here is the code sample.
First, we make an ObservableObject that will act as sort of a view model for the entire app.
class AppViewModel: ObservableObject

    static let shared = AppViewModel()

    @Published var showToast = false

    @Published var toastMessage = ""


    func showToastWithString(text: String) {

        self.toastMessage = text

        self.showToast = true

    }

}
Next, create a new file, and call it “ToastView”. Here is the code:
import Foundation

import SwiftUI


struct Toast: ViewModifier {

    // these correspond to Android values for

    //  DURATION_SHORT and DURATION_LONG

    static let short: TimeInterval = 2

    static let long: TimeInterval = 3.5

    let message: String

    @Binding var isShowing: Bool

    let config: Config


    func body(content: Content) -> some View {

        ZStack {

            content

            toastView

        }

    }


    private var toastView: some View {

        VStack {

            Spacer()

            if isShowing {

                Group {

                    Text(message)

                        .multilineTextAlignment(.center)

                        .foregroundColor(config.textColor)

                        .font(config.font)

                        .padding(.vertical, 16)

                        .padding(.horizontal, 30)

                }

                .background(Capsule().foregroundColor(config.backgroundColor))

                //.cornerRadius(8)

                .onTapGesture {

                isShowing = false

            }

            .onAppear {

                DispatchQueue.main.asyncAfter(deadline: .now() + config.duration) {

                isShowing = false

            }

        }

    }

    .padding(.horizontal, 16)

    .padding(.bottom, 18)

    .animation(config.animation, value: isShowing)

    .transition(config.transition)

}


struct Config {

    let textColor: Color

    let font: Font

    let backgroundColor: Color

    let duration: TimeInterval

    let transition: AnyTransition

    let animation: Animation

    init(textColor: Color = .white,

        font: Font = .system(size: 14),

        backgroundColor: Color = .black.opacity(0.588),

        duration: TimeInterval = Toast.short,

        transition: AnyTransition = .opacity,

        animation: Animation = .linear(duration: 0.3)) {

            self.textColor = textColor

            self.font = font

            self.backgroundColor = backgroundColor

            self.duration = duration

            self.transition = transition

            self.animation = animation

        }

    }

}
Next, we modify the ContentView file (or whatever you have named your primary view). I usually work with a file for class extensions, but in this example I wrote the extension into the ContentView file:
extension View

    func toast(message: String,

        isShowing: Binding<Bool>,

        duration: TimeInterval) -> some View {

            self.modifier(Toast(message: message,

            isShowing: isShowing,

            config: .init(duration: duration)))

    }

}
Here is the rest of ContentView. I left the alert example from earlier in there, but this is how the set up will work for the Toast View.
import SwiftU

struct ContentView: View {

    @State var showAlert = false

    @StateObject var appViewModel = AppViewModel.shared

    var body: some View {

        ZStack {

            Color.white

            Text("Order Toast")

                 .foregroundColor(.blue)

                 .multilineTextAlignment(.center)

                 .onTapGesture {

                     AppViewModel.shared.showToastWithString(text: "🍞 Toast Is Ready!")

                 }

        }

        .ignoresSafeArea()

        .alert(isPresented: $showAlert) {

            Alert(title: Text("Alert"), message: Text("This is an example of an alert controller"), dismissButton: .default(Text("Ok")))

        }

        .toast(message: appViewModel.toastMessage, isShowing: $appViewModel.showToast, duration: Toast.short)

    }

}
You can now call this line from any function in your app, and it will show your Toast View:
AppViewModel.shared.showToastWithString(text: "🍞 Toast Is Ready!")
Here is a video example. Hope this is helpful!